Getting Started with Azure Static Web Apps
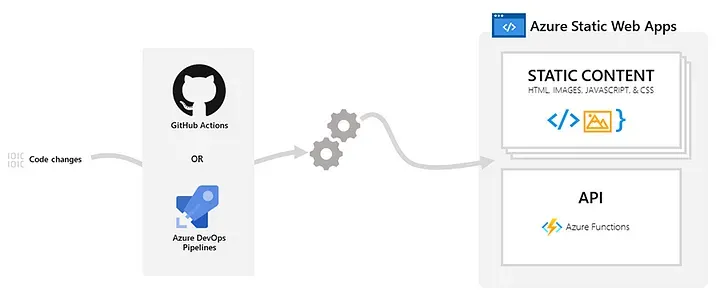
Azure Static Web Apps allows for easy setup of production-ready environments for web apps. You provide the GitHub repo link & it does the heavy lifting for you. This includes automatic setup of CI/CD pipelines, staging environments, SSL certs, a serverless API, and authentication.

Published on
This is part 1 of a tutorial series dedicated to getting you up & running with Azure Static Web Apps.
Azure Static Web Apps allows you to easily setup production and staging environments for static web apps. You provide the GitHub repository link and it does most of the heavy lifting for you. This includes automatically configuring CI/CD pipelines for GitHub Actions as shown in the feature image above, SSL certs, a serverless API, and authentication.
It is a very easy, affordable, and professional way to deploy web apps written in frameworks such as Vue, Angular, React, and Blazor, among others. Continue reading if you’re interested in learning about how you can use Azure Static Web Apps to deploy your application to a production environment at little or no cost.
What does it cost?
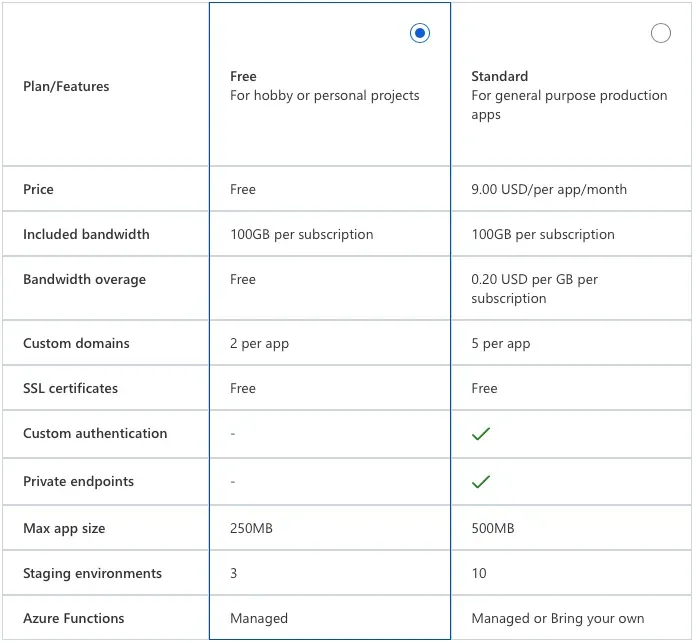
The Azure Static Web App service comes with a free tier and standard tier pricing. While Azure markets the free plan for “hobby and personal” projects, the truth is, the free tier will work just fine for production deployments. The practical limitations of the free plan are:
- Free plan does not include custom authentication; this is not an issue if you are using GitHub, Twitter, or Azure AD authentication. If you need to use custom authentication, you must set it up manually or pay the $9/month and avoid the hassle.
- Free plan has lower limits on app file size, custom domains, and concurrent staging environments. However, I have not found these to be too restrictive. If and when you exceed one of these thresholds, upgrade to the paid plan.
- The Azure Functions API provided by Azure Static Web Apps is limited to HTTP requests only. You cannot trigger from a schedule, from cloud events, etc.; only API calls. You may want to upgrade if you need full functionality. If so, you can Bring your own Azure Functions on the standard tier plan.
My advice is to start with the free plan, follow this tutorial series to get a better understanding of the service offering and your needs, and then make the call.
Deploy your app in 5 steps
In the is guided tutorial, we will deploy an example VueJS web app that I provide as an example starter app. You can download the zip from the v1 release in the example GitHub repository: click here to download. VueJS is used in this tutorial, but the instructions are basically the same regardless of the framework used.
Step 1: Bootstrap a VueJS App
Unzip the archive file and open the project directory in VS Code or your editor of choice.
# Switch to download directory
cd ~/Downloads
# Unzip it
unzip azure.static.webapp-1.zip
# Open the project in VS Code
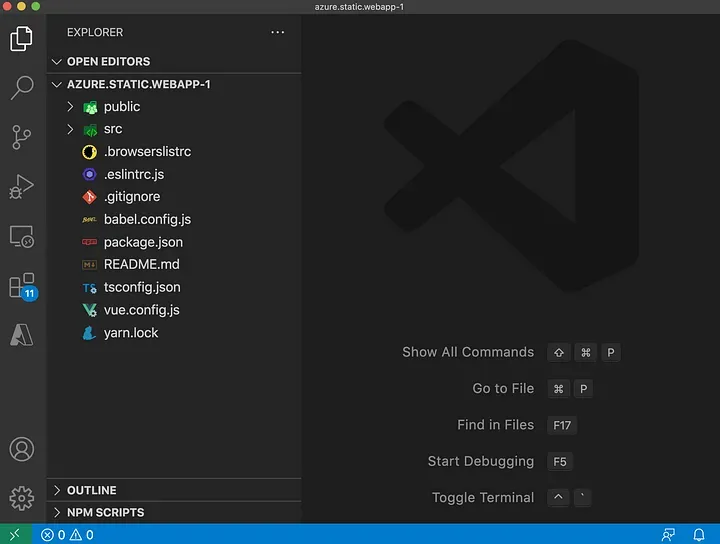
code azure.static.webapp-1In your editor, you should see a folder structure as shown below.
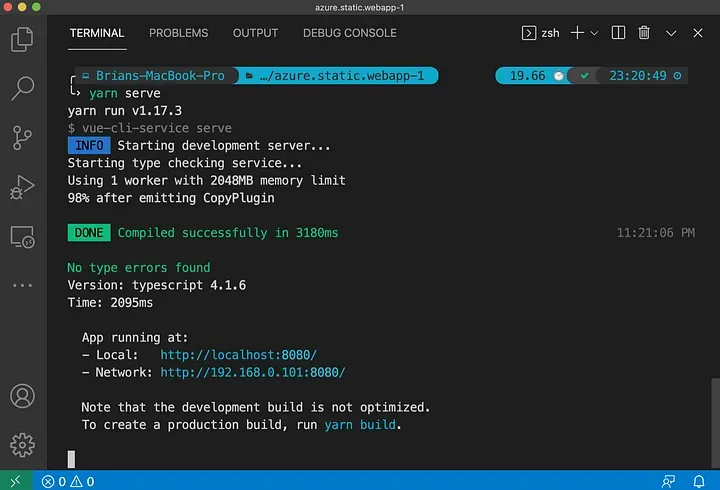
Open the integrated terminal and issue the following commands to ensure your project builds properly. I’ll be using yarn instead of npm for managing dependencies, but you're free to use whichever you like.
# Install dependencies from yarn.lock
yarn

# Serve up the app locally
yarn serve
If everything is good-to-go, you should see the local URL for the app. It will default to http://localhost:8080 and, if that port is in use, it will increment to port 8081.
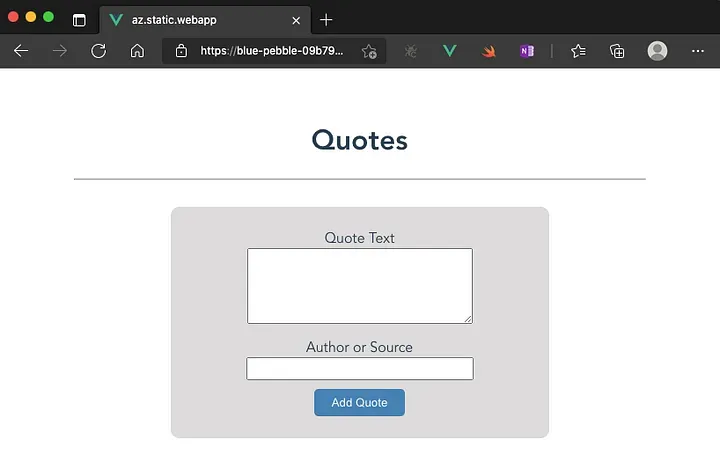
If you navigate to the localhost URL in your browser, you should (hopefully!) see the “quotes” app. It is a simple app that display quotes that you enter. It persists data using the browser localStorage. We'll convert this to a real database in a future post, but for now, this is nice & simple—which is great for a getting started tutorial.
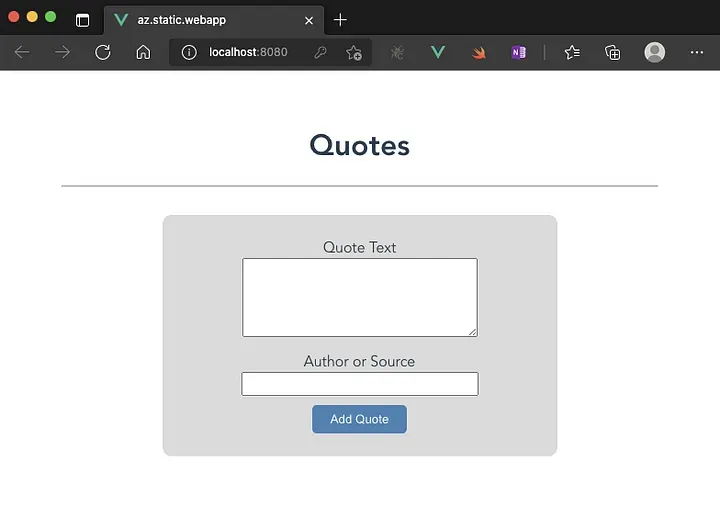
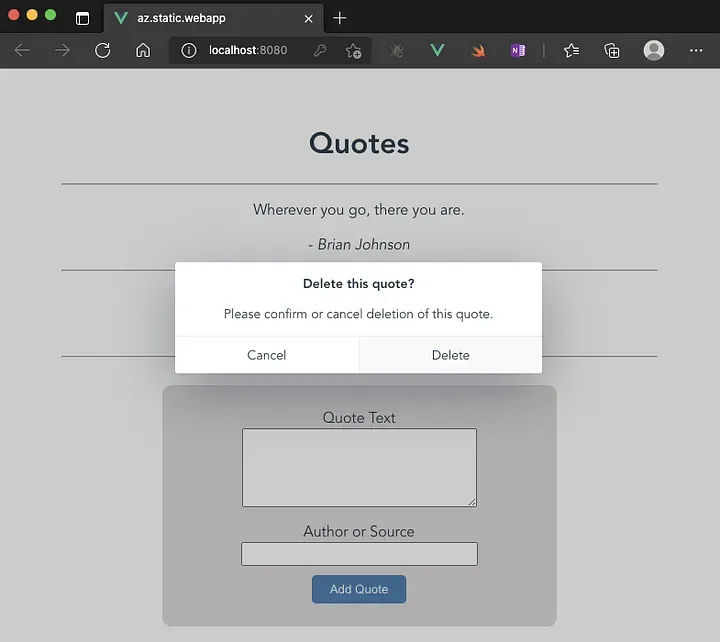
Before moving on, verify the app is working by adding a few quotes. Left-clicking on a quote will popup a dialog box that will allow you to delete a quote.
At this point, you’ve got a basic VueJS app bootstrapped and running locally. It is almost time to deploy. But, before moving on, you should push this code to a GitHub repository that you own. My repository is bjohnson-io/azure.static.webapp and that is what you will see in the forthcoming screenshots. You should replace this repository name with the name of your repository in the remaining steps.
Once you have your VueJS example app pushed to a repository, you’re ready to move on to the next step.
Step 2: Create an Azure Static Web App
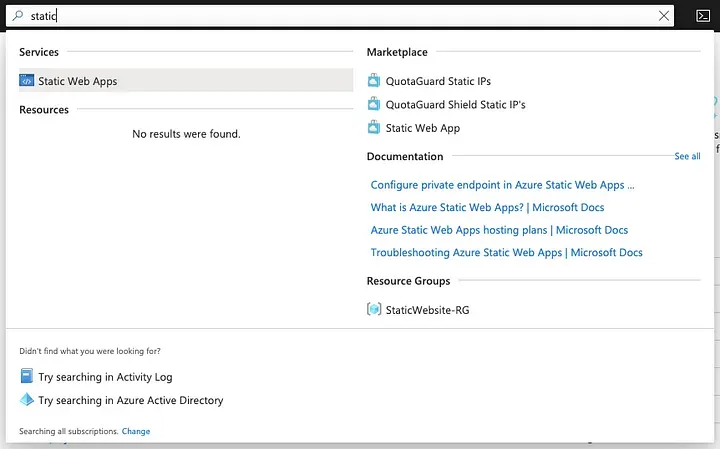
Login to the Azure Portal and type “static” in the search bar at the top. You should see an entry for “Static Web Apps” in the search results. Click it.
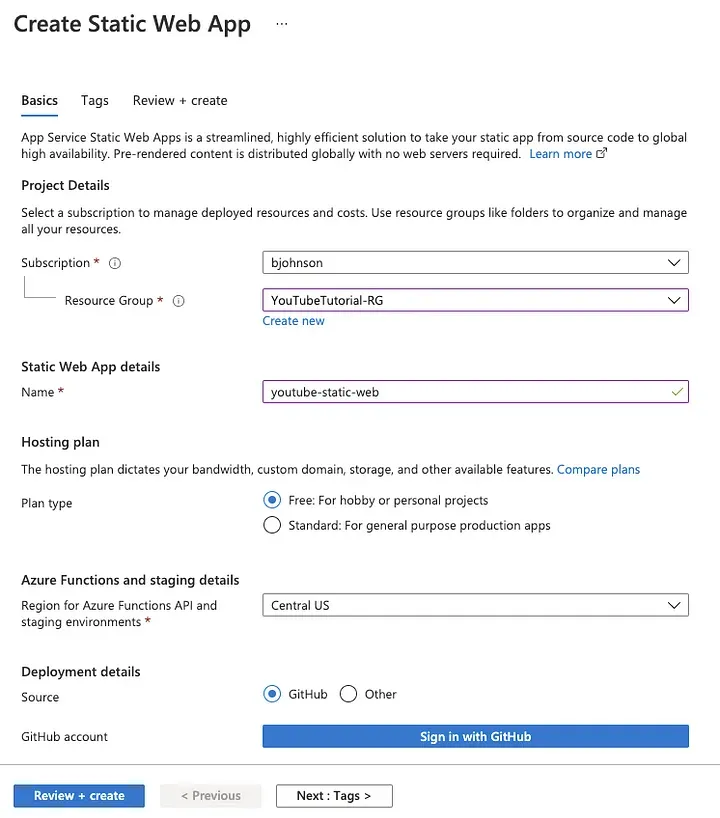
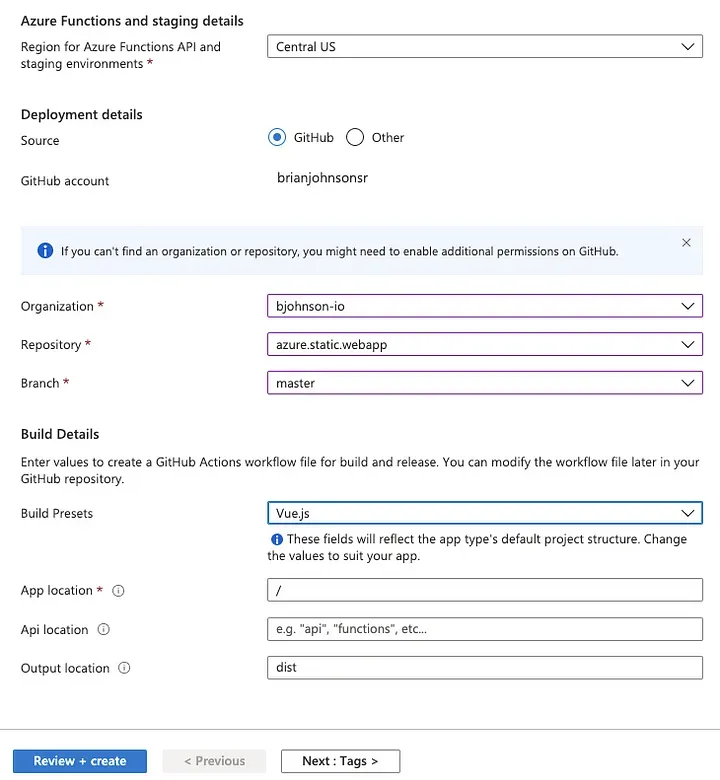
On the following page click the [+ Create] button. You should see the create page shown below. Fill out the form:
- Subscription: Leave as default or choose the subscription you want to use.
- Resource Group: Choose an existing RG or create a new one. Up to you.
- Name: A unique name for your Static Web App.
- Hosting Plan: Choose the free plan.
- Azure Functions Region: Choose whichever region you prefer.
- Deployment Source: Select GitHub.
Click the [Sign in with GitHub] button.
A popup will ask you for your GitHub password. Enter it and you should see a series of drop-down menus.
- Organization: Select the GitHub organization the repo belongs to.
- Repository: Select the repository you created at the end of Step 1.
- Branch: Select the
masterbranch.
For the Build Presets, choose VueJS and leave the remaining fields as they are.
Click [Review + create], then [Create] to deploy the free service. You should be presented with a deployment action screen. After the deployment is finished, you should see a screen like this.
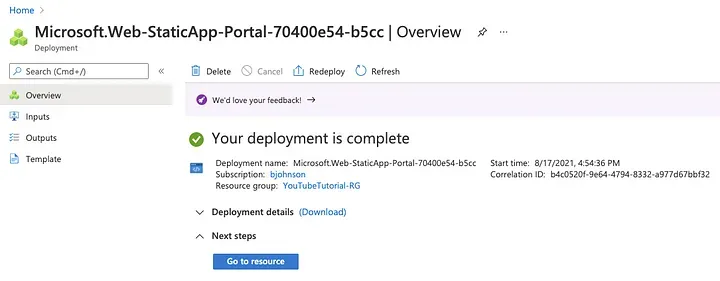
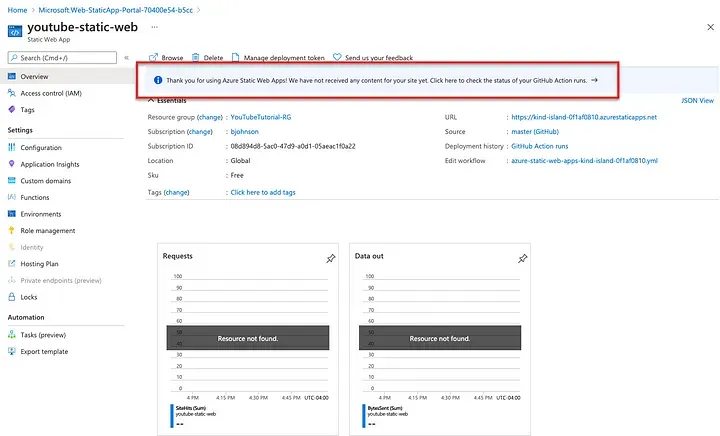
Click [Go to resource] to visit the dashboard of your Static Web App service. We will review the dashboard in a moment, but for now, click on the info bar outline in red below. This should take you to your GitHub repository Actions section. If you took a break and the app is already deployed, you may not see info bar. If that is the case, navigate to https://github.com/<account>/<repo>/actions in your browser.
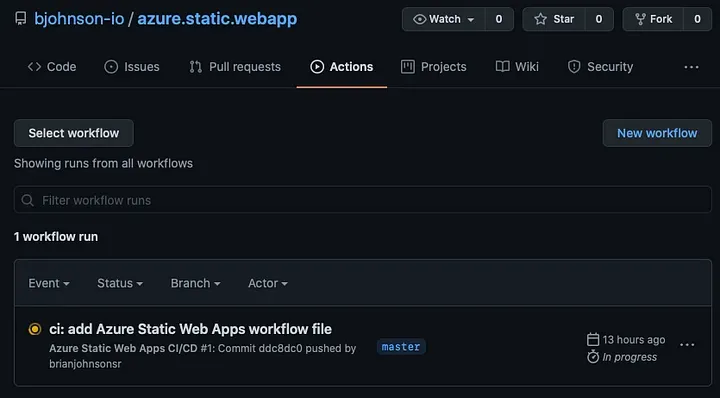
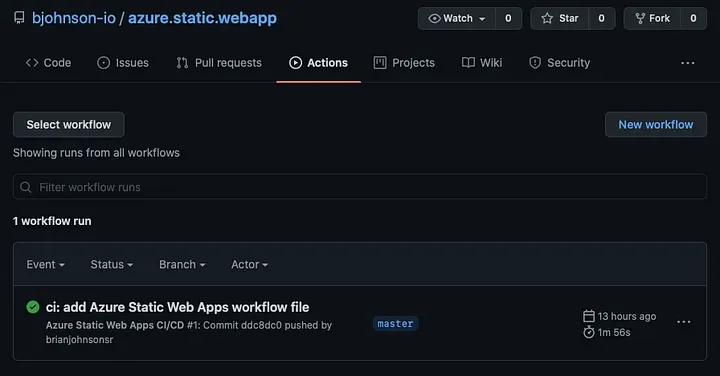
Step 3: Check GitHub Actions (CI/CD)
In GitHub Actions, we can see that Azure has automatically setup a CI/CD pipeline to build and deploy your app. What you are seeing right now is the production deployment that is building and pushing the VueJS app to Azure.
However, the fun doesn’t stop there. The CI/CD pipeline that Azure automatically configured for us will also automatically created a staging environment whenever a pull request is opened against the master branch.
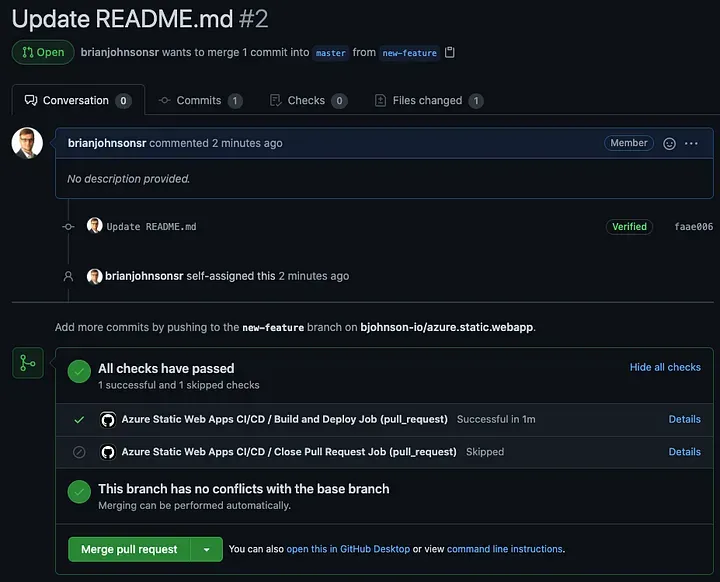
For example, let’s say I were to create a new branch called new-feature, make a change, and open a pull request against master. You will see that GitHub automatically runs a build and test and shows you the status.
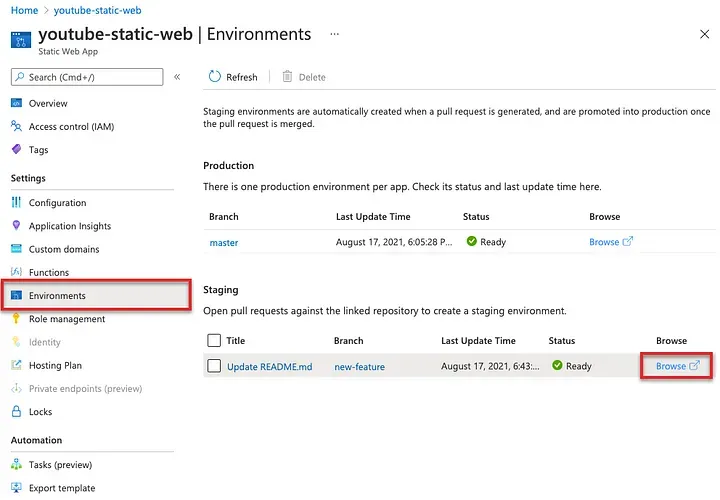
It’s nice that they automatically setup tests on pull requests. But, if you navigate back to the Static Web App in the Azure Portal & click on [Environments] from the sidebar menu, you will see that a new staging environment has been automatically setup — just click the [Browse] button to check it out!
Once the pull request is closed or merged, the staging environment will be automatically removed.
Ensure the build and deployment completed without error before continuing.
Step 4: Verify app is deployed
Back in the Azure Portal, click on the [Overview] in the sidebar of your Static Web App and then click the URL of the production deployment.
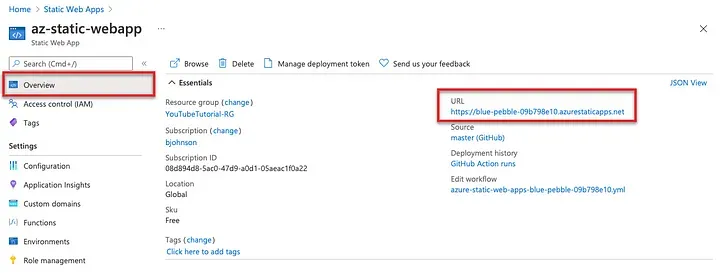
You should see our app, at the auto-assigned/secured web address provided by Azure. In the next step, we will add a custom domain for the production URL.
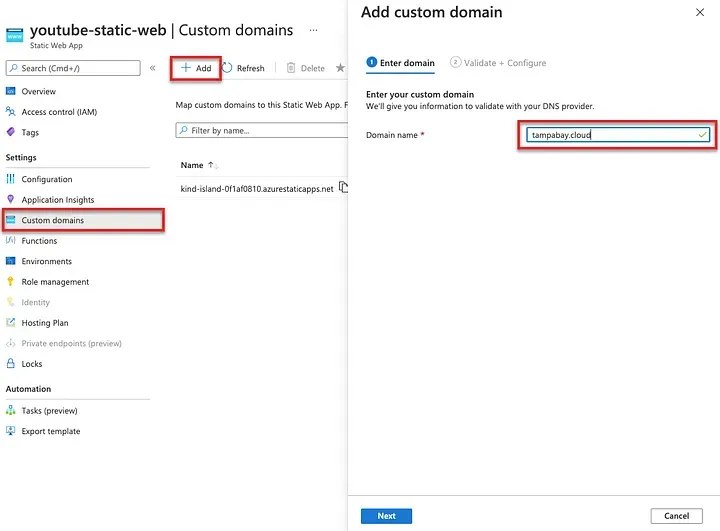
Step 5: Add custom domain
I doubt you’ll want to use that auto-generated Azure domain name so let’s add a custom domain to the app. I’m not currently using my tampabay.cloud domain so I'll be using it for this tutorial.
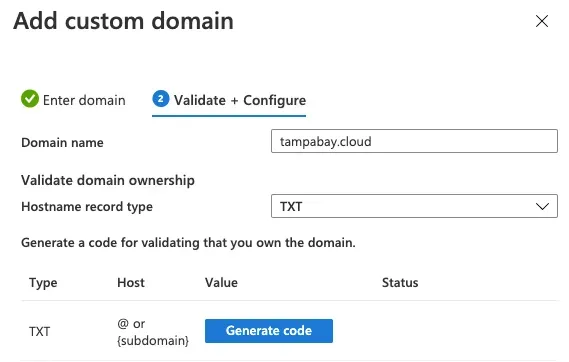
To verify that you, in fact, own/control the domain name you have entered, Azure will ask you to add a TXT record with a code that is generated for you. You will copy this code and enter the info the domain record wherever you manage your domains (GoDaddy, Azure DNS Zones, etc.). Click [Generate code] and be patient. It sometimes takes up to a minute.
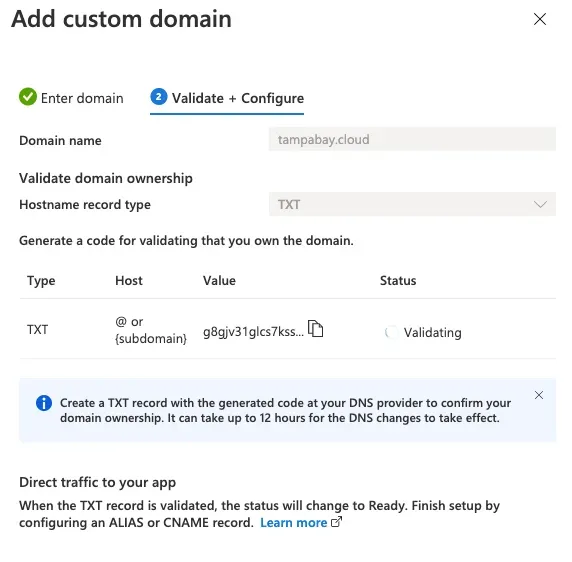
Once the code is generated, copy it, and add the record to the domain. You must consult your domain provider on how to accomplish this. Each one is a bit different so it’s not practical for me to include them all in this tutorial.
It usually takes about 30 minutes for the domain to verify. You can close this screen and check back later.
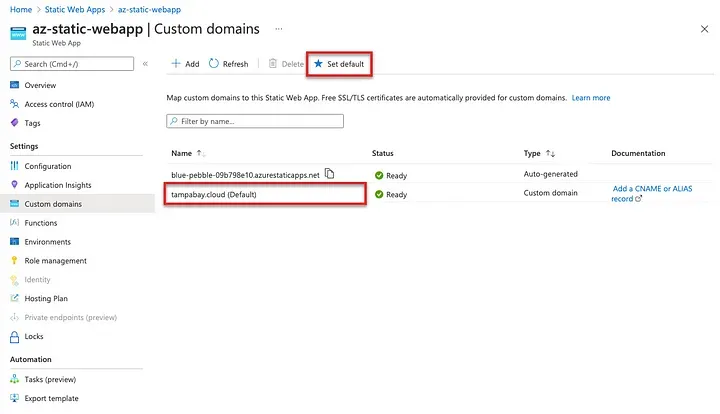
When the domain is verified, you should see a green check mark with “Ready” next to it on the [Custom domains] menu blade. Click on your domain name to select it and then click [* Set default] at the top. Your custom domain is now the default domain.
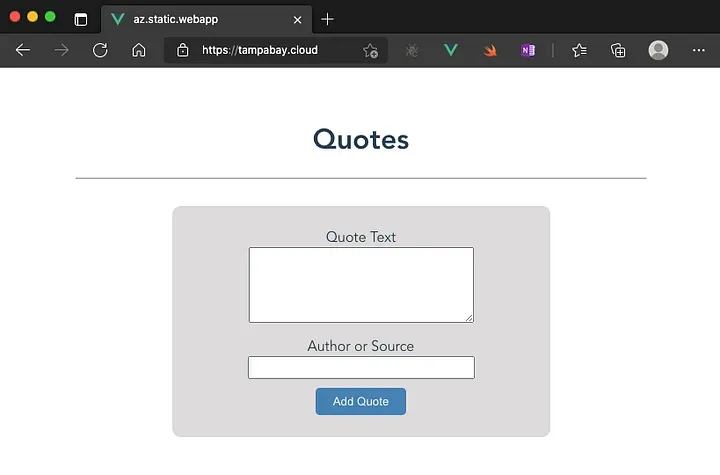
Navigate to your domain name and you should see that it is live, with SSL already configured.
Next Steps: Add a custom API
At this point, the basic tutorial is complete. If you don’t need a custom API, you may want to stop here. If that is the case, awesome! You now have a professional production and staging environment configured for your web app. If you’re interested in taking things a step further by adding a serverless API, and possibly even a serverless database like CosmosDB, stay tuned.
In the next post of this series, I’ll show you how to add a serverless GraphQL API to our quotes app.