Add CosmosDB to your Serverless GraphQL API

Published on
This is part 3 of a tutorial series dedicated to getting you up & running with Azure Static Web Apps.
This post is going to be much shorter than the previous tutorial. So if you made it to this point, no worries, as the hardest parts are over with. Adding a serverless CosmosDB for data persistence will actually be quite easy. Continue reading to see for yourself.
In this guided tutorial, we will add CosmosDB and use it to persist our quotes data. The last article focused on converting the API to GraphQL so we avoided databases altogether and implemented persistence with a in-memory array. It works fine as a temporary stop-gap measure, but it’s generally a terrible idea when using serverless or operating in a distributed system.
The five high-level steps to add CosmosDB are:
- Create a CosmosDB instance in Azure
- Install & configure Typegoose ORM
- Update the API to use Typegoose
- Deploy to staging environment & test
- Deploy to the production environment
Let’s work through these steps now to add CosmosDB to our Azure Static Web App.
Create a CosmosDB API for MongoDB
One of the most difficult parts of adopting newer database technologies is rewriting queries and losing the ecosystem of open source tools, such as SDKs and ORMs. A very cool feature of CosmosDB is that it offers several APIs. You want to query it with SQL? No problem. You want it to pretend to be a Cassandra (column-store) or Gremlin (graph) database? It can do that, too. It can also pretend to be a Mongo database. 😎
The SQL API for CosmosDB works great. However, as of right now, there are few, if any, compatible ORMs. The MongoDB API, on the other hand, seems to work just fine with popular tools.
Since I know the CosmosDB API for MongoDB works well with the mongoose and @typegoose/typegoose client libraries, we'll use the MongoDB API. Let's navigate to the Azure Portal to create a new CosmosDB instance.
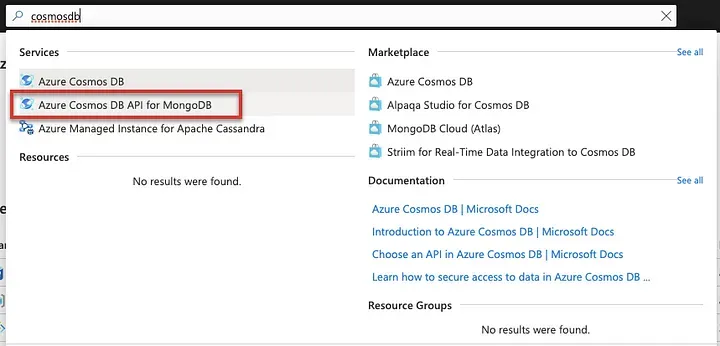
In the search bar of the Azure Portal, start typing cosmosdb and then select [Azure Cosmos DB API for MonogoDB] from the dropdown.
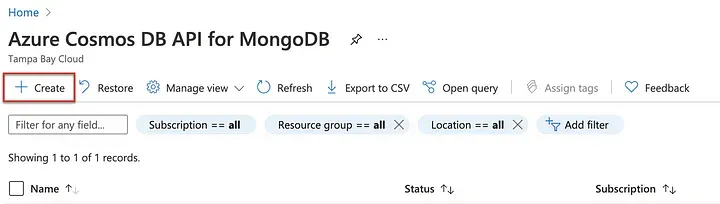
From the CosmosDB blade, click [+ Create] to create a new instance.
On the create screen, enter the following information:
- Resource Group: Select the one you’ve been using or a create a new one.
- Account Name: This must be unique across Azure; add some numbers.
- Location: I would choose the same region your serverless API is deployed to.
- Capacity: Choose serverless.

When you’re ready to create, click [Review + create] and then [Create] on the validation/review screen.
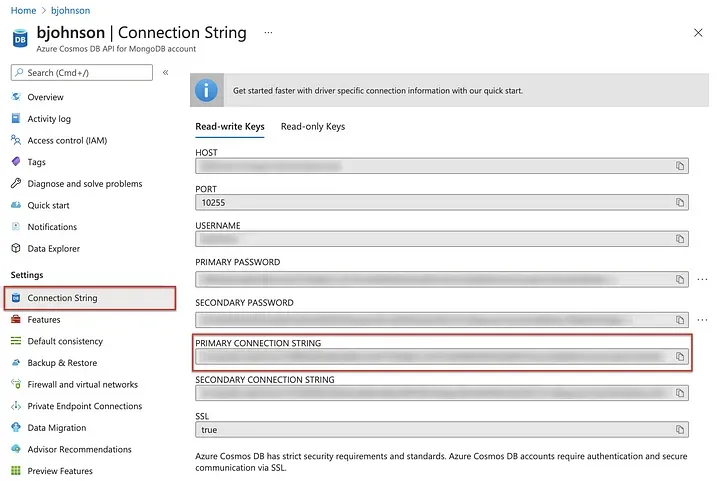
Once the resource has been successfully created, follow the link to visit your management interface. Click on [Connection String] from the sidebar menu and then copy the primary connection string, outlined in red below.
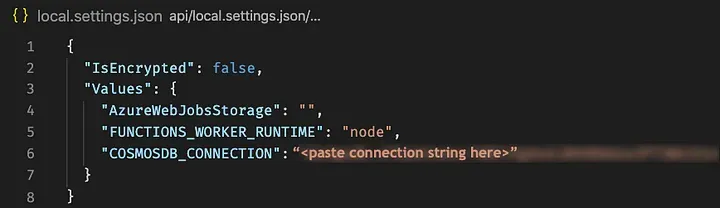
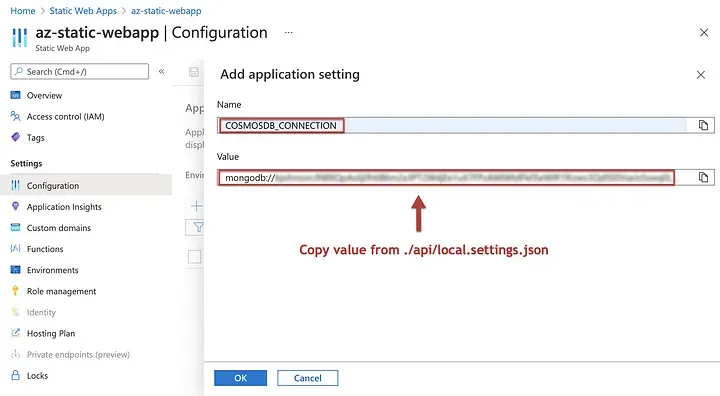
In the ./api/local.settings.json file, add an environment variable named COSMOSDB_CONNECTION and paste the primary connection string you copied from the Azure Portal.
That’s it for the CosmosDB setup. Pretty simple, right? 🥳
Install Typegoose ORM for MongoDB
Now that we have a CosmosDB instance running with a MongoDB API, it is time to update our code. First, course of business is to create a new branch. Enter git checkout -b add-cosmosdb to create a new branch and check it out.

Next, we’ll install the dependencies for Mongoose and Typegoose using yarn add mongoose @typegoose/typegoose. Mongoose is an Object Relational Mapper (ORM) for MongoDB and Typegoose is a TypeScript wrapper for Mongoose that makes life in TypeScript a little easier.
The current version of Typegoose requires node v12.22 or greater. If you are using an older version of node, be sure to upgrade before proceeding.

Since Typegoose uses TypeScript decorators, we’ll need to enable emitDecoratorMetadata and experimentalDecorators in the ./api/tsconfig.json config file.
{
  "compilerOptions": {
    "module": "commonjs",
    "target": "es6",
    "outDir": "dist",
    "rootDir": ".",
    "sourceMap": true,
    "strict": false,
    "skipLibCheck": true,
    "emitDecoratorMetadata": true,
    "experimentalDecorators": true
  }
}
./api/tsconfig.json
With Typegoose and Mongoose installed and our TypeScript configuration updated, it’s time to move on to the next step.
Update GraphQL API to use Typegoose
Since we chose the CosmosDB API for MongoDB, there is no CosmosDB-specific setup required. The updates we will make below are no different than if you were using MongoDB. Typegoose is made to work with MongoDB and, as far as it is concerned, it is working with MongoDB. This keeps things simple and familiar.
We have only 3 files to update/create. Follow the instructions below to make the necessary changes to your API.
./api/graphql/index.ts
We need to bootstrap the Mongoose connection in our index.ts file. Update your index.ts file so that it matches what you see below. Ensure that you followed the earlier instructions to add a COSMOSDB_CONNECTION environment variable to your ./api/local.settings.json file, as it is referenced on line 5.
// DB Config
import * as mongoose from 'mongoose';
const dbOptions = { useNewUrlParser: true, useUnifiedTopology: true, dbName: 'quotes' };
mongoose.connect(process.env.COSMOSDB_CONNECTION, dbOptions)
  .then(() => console.log('mongoose connected!'))
  .catch(err => console.error(err));

// GraphQL Config
import { ApolloServer } from 'apollo-server-azure-functions';
import typeDefs from './schema';
import resolvers from './resolvers';

const server = new ApolloServer({ typeDefs, resolvers });
export default server.createHandler();
./api/graphql/index.ts
./api/graphql/models.ts
Create the models.ts file for your Typegoose models. You'll probably split this into multiple files if you have more than a few models. But, we only have one so this single file will suffice.
import { prop, getModelForClass } from '@typegoose/typegoose';

export class Quote {
  @prop({ required: true })
  public source!: string;

  @prop({ required: true })
  public text!: string;
}
export const QuoteModel = getModelForClass(Quote);
./api/graphql/models.ts
./api/graphql/handlers.ts
Finally, in our handlers.ts file, import QuoteModel and use it for persisting the data. As you can see, the code it very concise and simple. You can overwrite the current file with the code below.
import { QuoteModel, Quote } from './models';

export async function listQuotes() {
  return await QuoteModel.find();
}

export async function createQuote(_parent: any, args: { input: Quote }) {
  const quote = await QuoteModel.create(args.input);
  console.log(quote);
  return quote;
}

export async function deleteQuote(_parent: any, args: { id: string }) {
  const quote = await QuoteModel.findById(args.id);
  if (quote) {
    await quote.delete();
    return quote;
  }
}
./api/graphql/handlers.ts
That’s it! Proceed to the next section to boot the local development server and test the changes.
Test the changes locally
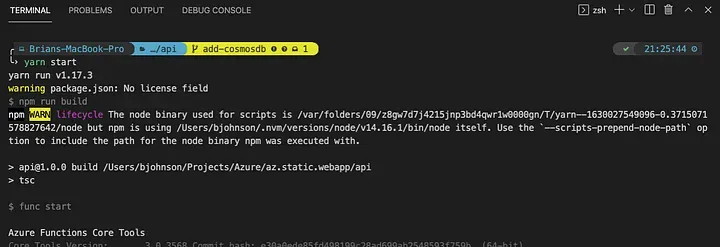
First, test the API itself by switching to the ./api directory and running yarn start. This will run tsc to compile the TypeScript code and launch a local development server with the func CLI.
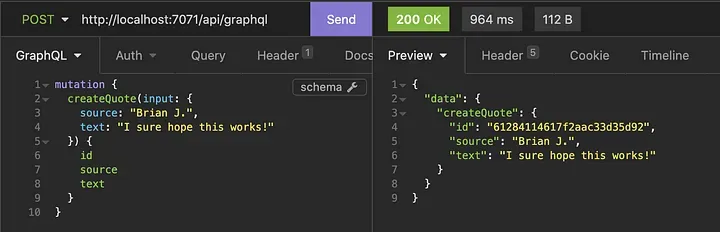
When the API is ready, use Insomnia or your API tester of choice to test the endpoint. Start by entering the GraphQL mutation to create a new quote.
It looks like it worked! For the real test, though, let’s peek inside CosmosDB to see if our data was persisted. Switch back to the Azure Portal and navigate to your CosmosDB API for MongoDB instance. Then select [Data Explorer] from the sidebar. On the data explorer blade, you should see a new database named quotes has been created—click it.
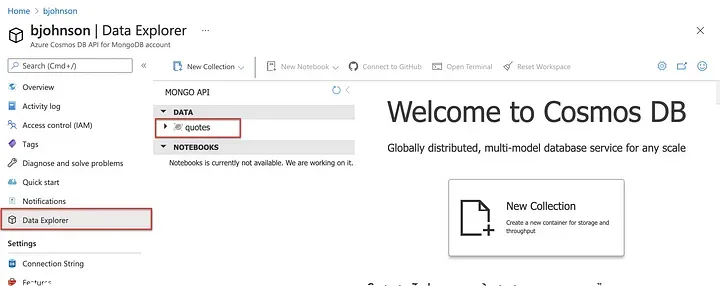
After clicking on the quotes database, click through the tree to Documents and click that, too. Then, click on the first and only entry under the _id header, 612841146..., as shown in red below.
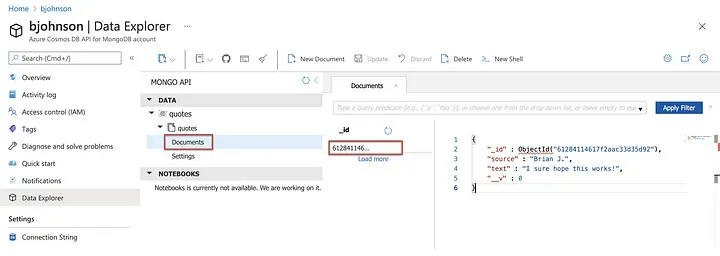
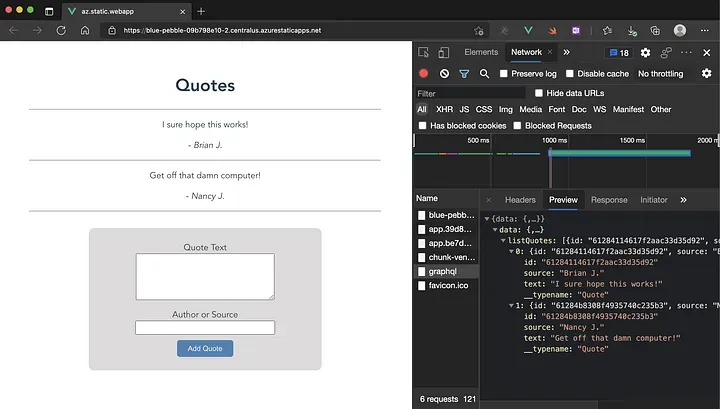
Hooray! We can see the data persisted! Let’s quickly switch back to Insomnia and pull that information from CosmosDB via GraphQL.

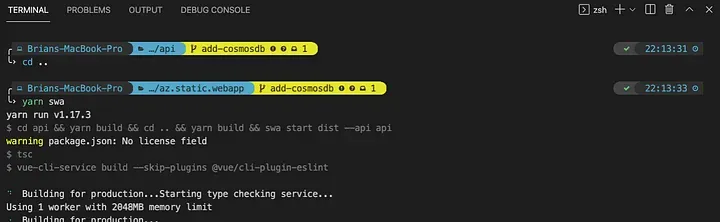
Nice! It looks like everything is good-to-go with the API. Let’s change to the root project directory and run yarn swa to test the app as a whole.
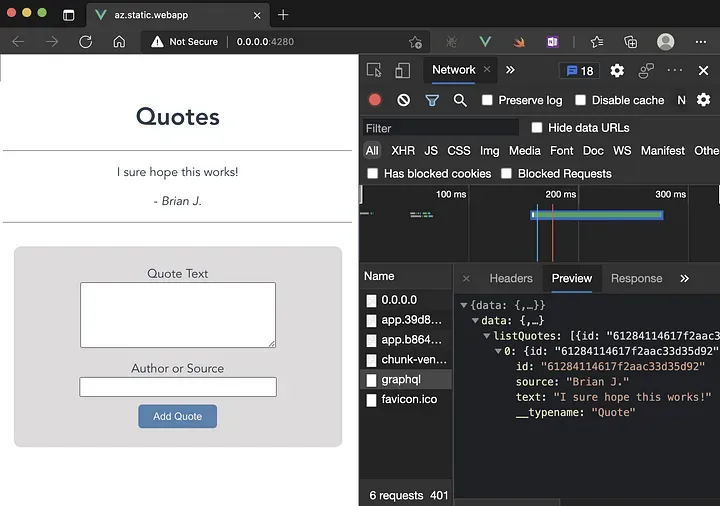
When the development server is ready, navigate to http://localhost:4280 to check the app. In the screenshot below, it appears the query worked fine. Go ahead and add a new quote through the web app UI to verify the front-end app is working as expected.
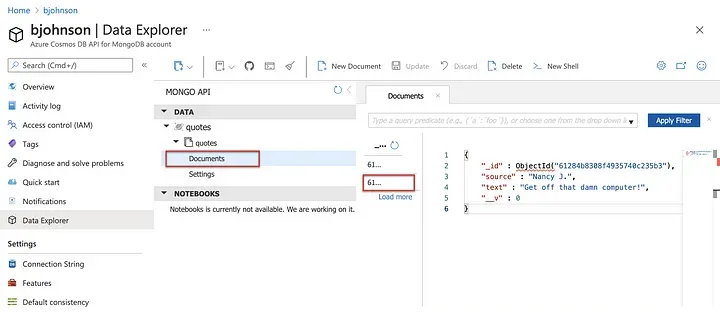
If you check back in the Azure Portal, you should see the new quote you added. I entered the quote “Get off that damn computer!” which I hear from my lovely wife on a regular basis. 😅
Since I can see that the quote I created through the app has been persisted to CosmosDB, I am ready to push the code and trigger a staging deployment. If you can see your quote in CosmosDB, then you’re ready to deploy, as well.
Deploy updates to staging environment
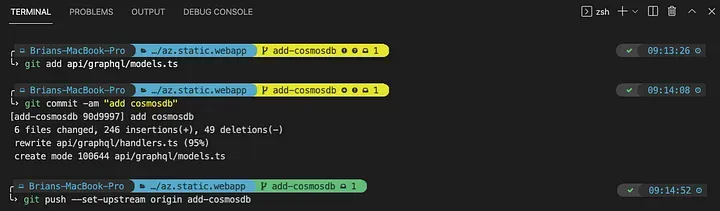
Since our deployment pipeline is triggered from our repository, the first step is to push the branch to GitHub. Add the new models.ts file and commit all changes, as shown below. Once all changes are committed, push to your repo with git push --set-upstream origin add-cosmosdb.
Once the push is complete, navigate to your GitHub repo and open a pull request against the master branch.
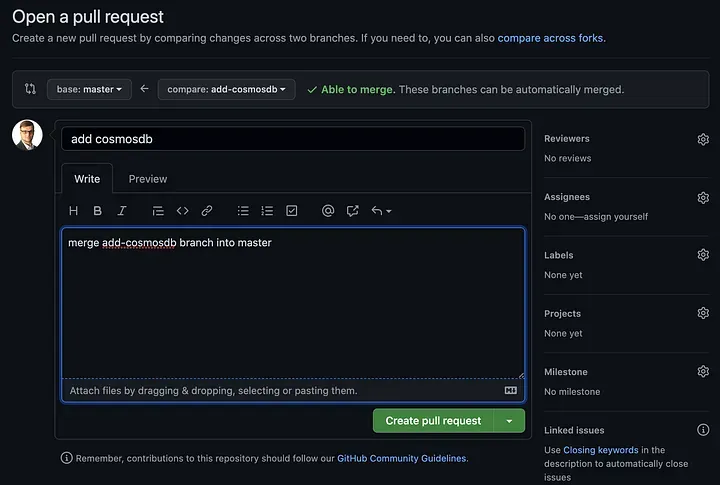
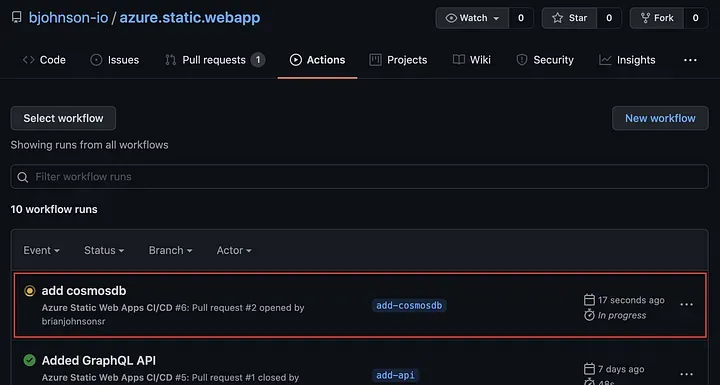
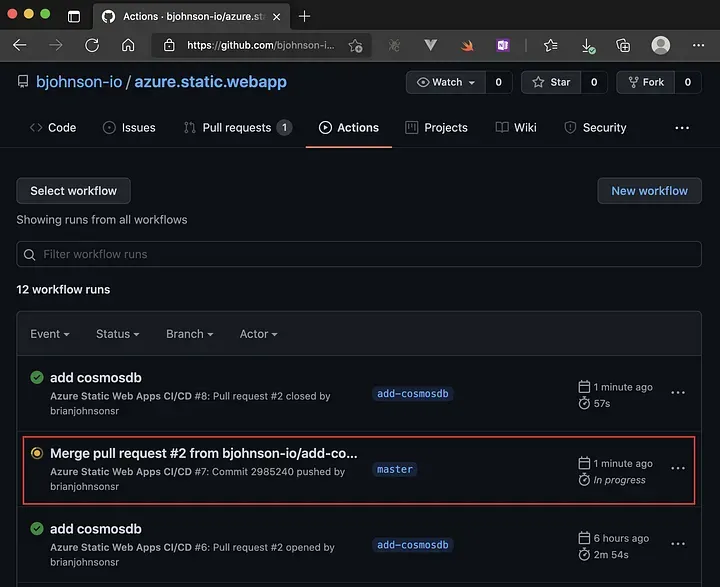
Once you click [Create pull request], a deployment will be triggered. Click on the [Actions] tab to view the status of the deployment.
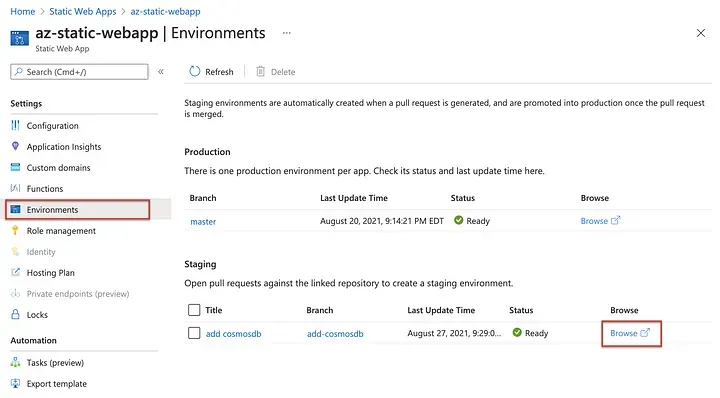
Once the deployment completes, switch to the Azure Portal, navigate to your Azure Static Web App service, and click [Environments] in the sidebar menu. You should see the staging environment created by the pull request.
Click on the [Browse] link to view the staged app.
When you browse to the app… what the heck?!? It isn’t working! 🤬
What’s happening, here?
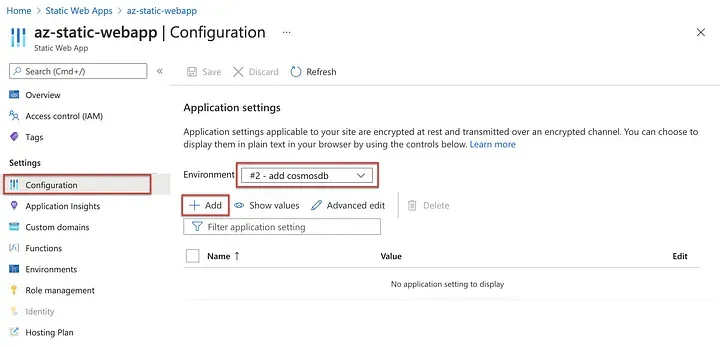
While we have a COSMOSDB_CONNECTION environment variable in our local environment, thanks to local.settings.json, we have not yet set this value in Azure. Click [Configuration] in the sidebar, select the staging environment, and click [+ Add] to create a new environment variable.
Input COSMOSDB_CONNECTION for the variable name and copy the connection string from your local.settings.json file. Click [OK] when you are finished.
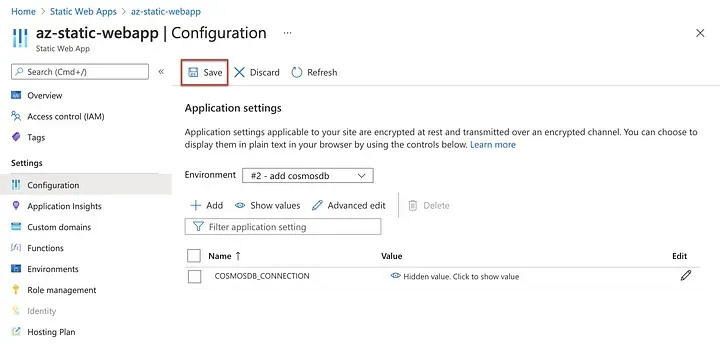
You’re not done, yet! Be sure to click that [Save] button to commit the changes.
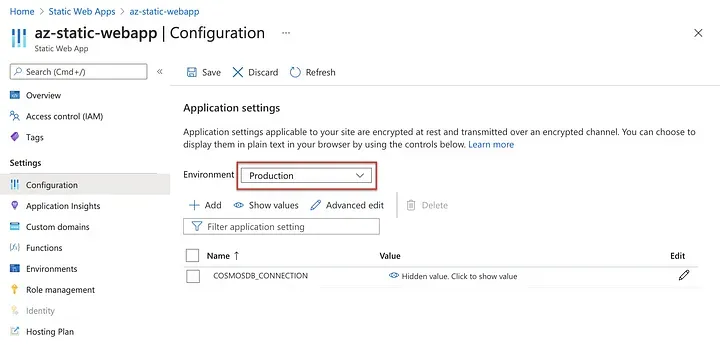
Before we move on, repeat the exact same process but for the production environment. In a real-life scenario, you’re going to want your deployment pipeline to create/destroy a separate CosmosDB instance for your staging environment. But, for now, let’s keep things simple and just copy the same values to production.
After saving the environment variables for the production environment, go back and check the app with the staging link. (We haven’t deployed to production, yet!) With the environment variable set, it should now work.
And it does! 🍻
Deploy updates to production
The staging deployment checks out so let us now send it to production. All we have to do is merge the pull request and wait for the triggered action to complete.
Go ahead and navigate to open pull request on your GitHub repo. Merge the pull request to continue.
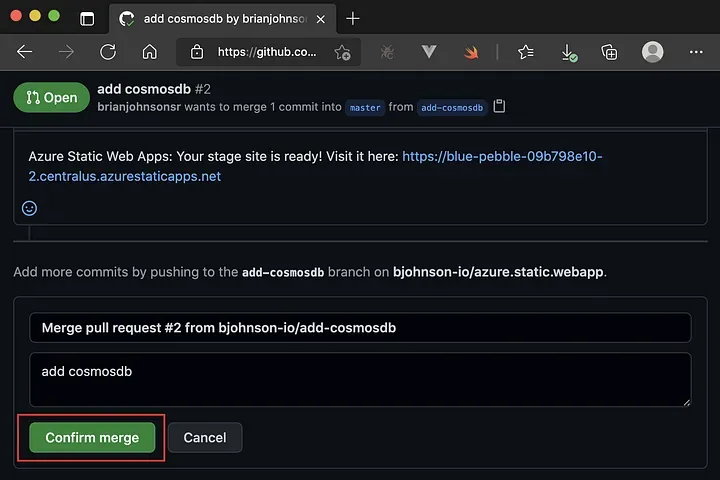
This should kickoff the production deployment. Wait for the deployment to complete before moving on.
Once the deployment action has completed, navigate to your custom domain in the browser. I’m using tampabay.cloud so that's the URL I will check.
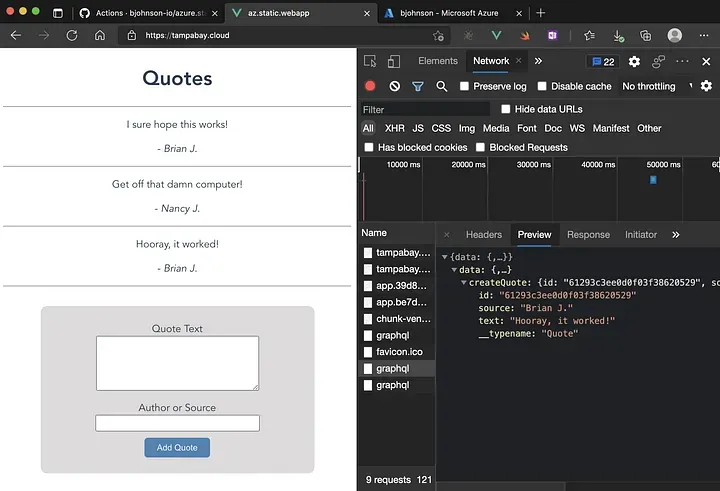
Pat yourself on the back because, if you’re seeing what I’m seeing, you successfully completed this tutorial! 🏆
Next Steps: User Authentication
If you’re not concerned about user authentication, you can stop here and use the boilerplate code you’ve developed as a starting point for your project. However, if you are interested in learning about and implementing authentication in your app, stay tuned.
Until then! 👋