Add a Serverless GraphQL API to your Azure Static Web App
In the previous post, we bootstrapped a basic VueJS app and deployed it to Azure Static Web Apps. The app is currently using localStorage to persist data, but in this post, we'll create a serverless GraphQL API and update our VueJS app to use the new API for data queries and persistence.

Published on
This is part 2 of a tutorial series dedicated to getting you up & running with Azure Static Web Apps.
In part 1 of this tutorial series, we bootstrapped a basic VueJS app and deployed it to Azure Static Web Apps. The VueJS app is currently using localStorage to persist data, but we will change that. In this post, we'll create a serverless GraphQL API and update our VueJS app to use the new API for data queries and persistence.
Guided Tutorial
In this guided tutorial, we will add an API to the Azure Static Web App we created in the previous tutorial. After checking to ensure everything is wired up properly, we’ll convert the API endpoint to GraphQL using a special version of Apollo Server made for Azure Functions. Finally, we will update the front-end VueJS app to use the Vue Apollo Client for interacting with the serverless GraphQL API we built.
Step 1: Install tooling for Azure
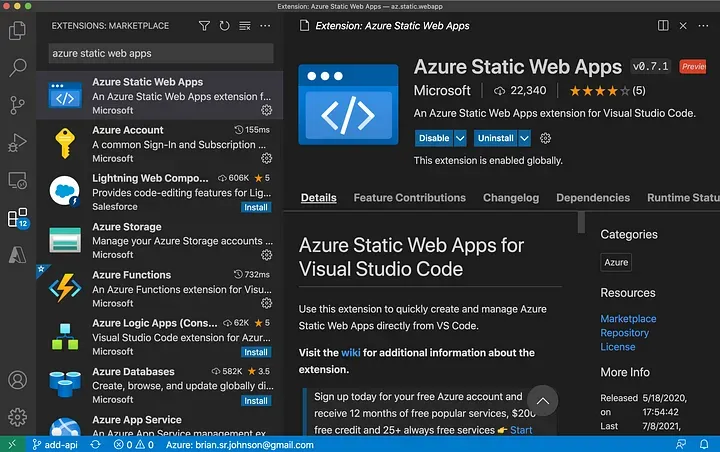
Before we start, ensure you have the CLI tools for Azure Functions and Azure Static Web Apps installed globally. To this, issue the following commands in your terminal.
npm i -g azure-functions-core-tools@3 --unsafe-perm true
npm install -g @azure/static-web-apps-cli
Step 2: Scaffold an API endpoint
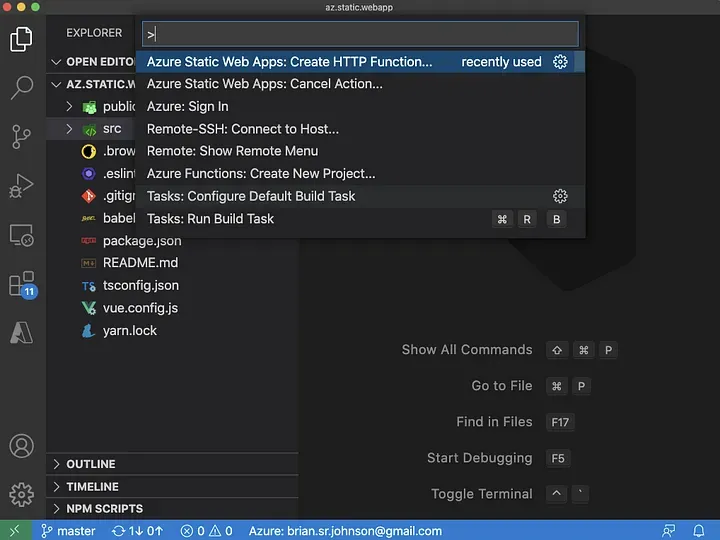
Create and checkout a new git branch by entering git checkout -b add-api in VS Code's integrated terminal. Next, use Cmd+Shift+P (Mac) or Ctrl+Shift+P (Win) to open the command palette. Start typing Azure Static Web Apps and then select [Create HTTP Function] from the short list. In the following menus, select [TypeScript] for the language and enter graphql as the name.
If you haven’t yet signed into Azure from VS Code, you should select Azure: Sign In from the command palette, first.
The extension will create an api directory and add a boilerplate serverless function in the ./api/graphql directory since we chose graphql as the function name.
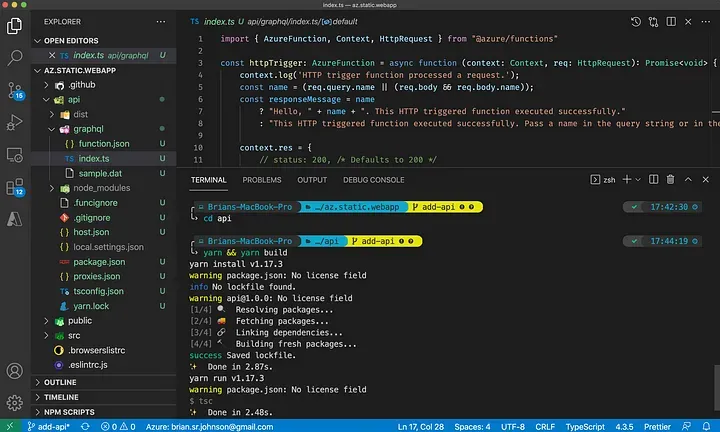
In your integrated terminal, change to the api directory and run yarn && yarn build to ensure the serverless function will build. This will install dependencies and get rid of the import errors identified by VS Code.
If you’re not using VS Code, you can see what files were added from this commit. All of the additions are in the ./api directory.Checkpoint: Understanding the API folder & config files
If you take a look in the api directory, you'll notice it is a separate project with its own package.json file. This is because your static web app will be deployed to a CDN, whereas the API will be deployed to the Azure Functions serverless compute service. We don't need to concern ourselves with this since Azure Static Webs Apps will handle the deployment details for us. However, it is helpful to know insofar that it helps us understand why the api directory is a subproject of our project.
./api/
The api directory is the root directory for our API. Underneath it will be directories for each endpoint we create. Since we are building a GraphQL API, we'll only need one endpoint: /api/graphql. Azure Functions defaults to assigning routes by directory names, but we can override that in the api/graphql/function.json config file with the route key on the input binding object. However, since we named our directory graphql, this is not needed.
./api/graphql/function.json
Let’s first have a glance at the default config provided. Before moving on, please take a moment to review the comments in the file contents below so that you understand what each config key is for.
{
  // describe the input & output function bindings
  "bindings": [
    {
      // this is the func input binding
      "direction": "in",
      // what event triggers this code
      "type": "httpTrigger",
      // variable name for the request object
      "name": "req",
      // allowed http methods
      "methods": ["get", "post"],
      // do not require an api token
      "authLevel": "anonymous"
    },
    {
      // this is the func output binding
      "direction": "out",
      // output object type
      "type": "http",
      // variable name for response (or use $return)
      "name": "res"
    }
  ],
  // function entrypoint
  "scriptFile": "../dist/graphql/index.js"
}
./api/graphql/function.json
We’ll leave the function.json file as-is for now, presuming yours looks like the one above without comments.
./api/graphql/sample.dat
The sample.dat file is used for testing. Specifically, when invoking a function via the CLI but without mocking the API, this can be passed to the invoked function. Very helpful when writing tests. Since we're using an HTTP trigger, this would be the request body/payload passed to the function. This name value can be accessed in our api/graphql/index.ts script via req.query.name for GET requests and req.body.name for POST requests. See line 5 in the auto-generated index.ts script for an example.
./api/graphql/index.ts
The index.ts is our TypeScript entry point file. Once compiled, this file will become api/dist/graphql/index.js—which matches the scriptFile key value in our api/graphql/function.json config file.
./api/host.json
While each endpoint function has its own function.json to define the configuration, there is only one host.json file. This is because this configures the Azure Functions host deployment, in which the code for all of the functions is executed. It is not important for you to understand this file unless you bring your own Azure Functions (standard plan required). When using the API provided by Azure Static Web Apps, you can safely ignore this file.
./api/local.settings.json
This is the equivalent of a .env file for your serverless API. Everything in the Values object is loaded as environment variables at runtime. For example shown below, in your index.ts code, process.env.FUNCTIONS_WORKER_RUNTIME would contain the value node.
{
  "IsEncrypted": false,
  "Values": {
    "AzureWebJobsStorage": "",
    "FUNCTIONS_WORKER_RUNTIME": "node"
  }
}
./api/local.settings.json
The local.settings.json file is for local development. To set values for your production environment, you can access the config sidebar menu item in the Azure Static Web App dashboard. In the example below, I defined a production environment variable SOME_KEY. I could access its value, "SOME_VALUE", from process.env.SOME_KEY within my index.ts file.
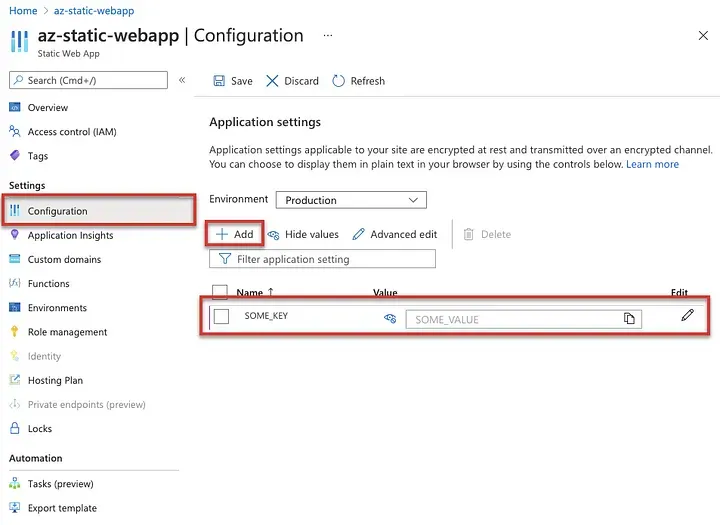
Environment variables are only available to the API. If you would like to set environment variables for the VueJS front-end web app, you should do so via the configuration of your builder, such as webpack.
The remaining files are standard NodeJS and TypeScript files and not specific to Azure Functions or Azure Static Web Apps.
Step 3: Test locally with Azure CLI tools
While it may be tempting to begin converting this endpoint from REST to GraphQL, it makes sense to perform a few basic tests to ensure everything is configured properly. Let’s do that now.
Test the API
In the index.ts file, we can see that the function retrieves the parameter name from the request object (req) and then inserts it into a string ( responseMessage) which it then returns by assigning it to the response object (context.res).
If you would like to simply pass the response via the function’s return value, you can do so by changing thebindings.out.namefromresto$returnin thefunction.jsonfile.
To test this function, we’ll start a local development server and check to see if the name parameter gets returned in the response.
import { AzureFunction, Context, HttpRequest } from '@azure/functions';

const httpTrigger: AzureFunction = async function(context: Context, req: HttpRequest): Promise<void> {
    context.log('HTTP trigger function processed a request.');
    const name = (req.query.name || (req.body && req.body.name));
    const responseMessage = name;
    context.res = {
        body: responseMessage
    };
};
export default httpTrigger;
./api/graphql/index.ts
Ensure you are in the ./api directory in your integrated terminal and enter yarn start to start a local development server. Since we're only testing the serverless API, the server is available on local port 7071 and the endpoint we created will be available at http://localhost:7071/api/graphql. Let's hit that endpoint to ensure it works as expected.
I like using Insomnia since it is lightweight but has good support for GraphQL and OIDC authentication. But you can use whatever API testing app you prefer, such as Postman. In my Insomnia app, I can see the function is working as expected. I passed it a payload with a name key and it successfully returned a message with "Brian J." contained within it.

Looks like we’re good-to-go. Next, we will repeat this same API call, but from inside the front-end VueJS app.
Add an API call to the VueJS app
Open your ./src/App.vue file in VS Code and add the created() function as shown in the code below. If syntax highlighting isn't working in the .vue file, install the Vetur Extension.
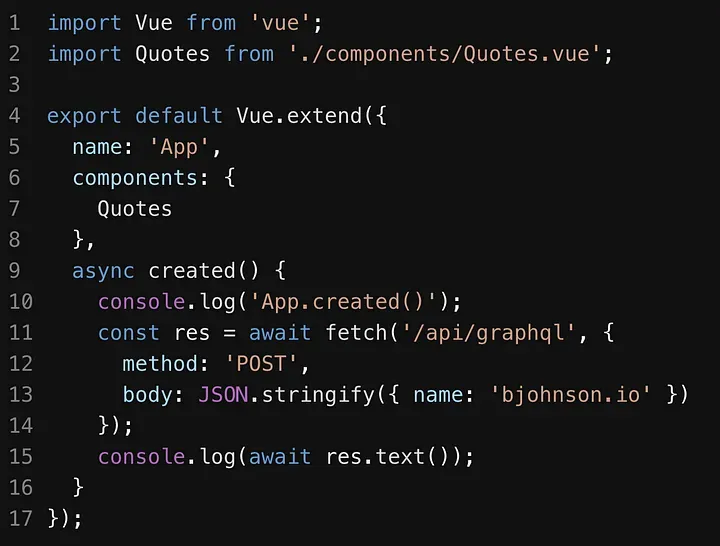
This will make a call to the API from our web app. To test, we should be able to open the web app and see the logs in the browser’s console.
Test the VueJS + API together
We can test our API with the func CLI on port 7071 and we can test our front-end app using the tooling provided by the framework. In this section, we'll use the swa CLI to load the front-end VueJS app and the serverless API together so they can be tested as one.
We need to make one quick tweak to our GitHub Actions workflow before proceeding. The swa CLI will look at our workflow file to determine which directory to load our API from. In the workflow file, change the api_location value to api, as shown on line 21 in the excerpt below.
# -- Begin Excerpt ---
jobs:
  build_and_deploy_job:
    if: github.event_name == 'push' || (github.event_name == 'pull_request' && github.event.action != 'closed')
    runs-on: ubuntu-latest
    name: Build and Deploy Job
    steps:
      - uses: actions/checkout@v2
        with:
          submodules: true
      - name: Build And Deploy
        id: builddeploy
        uses: Azure/static-web-apps-deploy@v1
        with:
          azure_static_web_apps_api_token: ${{ secrets.AZURE_STATIC_WEB_APPS_API_TOKEN_BLUE_PEBBLE_09B798E10 }}
          repo_token: ${{ secrets.GITHUB_TOKEN }} # Used for Github integrations (i.e. PR comments)
          action: "upload"
          ###### Repository/Build Configurations - These values can be configured to match your app requirements. ######
          # For more information regarding Static Web App workflow configurations, please visit: https://aka.ms/swaworkflowconfig
          app_location: "/" # App source code path
          api_location: "api" # Api source code path - optional
          output_location: "dist" # Built app content directory - optional
          ###### End of Repository/Build Configurations ######
# --- End Excerpt
./.github/workflows/<file-name>.yml
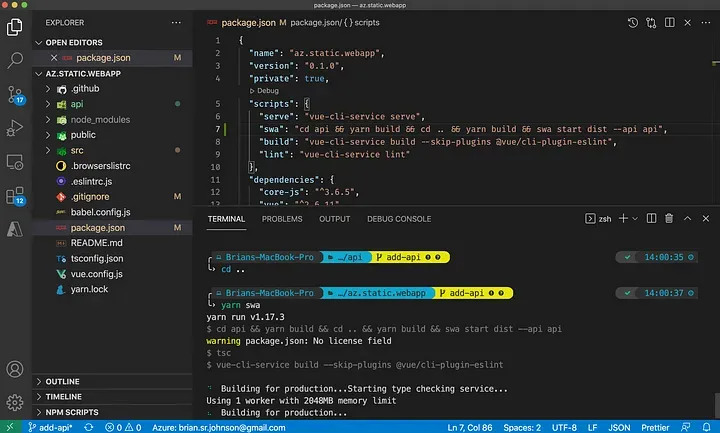
Also, to make our lives a little easier, we can add a script to ./package.json in the root folder of the project, like so:
// --- Begin Excerpt ---
"scripts": {
	"serve": "vue-cli-service serve",
	"swa": "cd api && yarn build && cd .. && yarn build && swa start dist --api api",
	"build": "vue-cli-service build --skip-plugins @vue/cli-plugin-eslint",
	"lint": "vue-cli-service lint"
},
// --- End Excerpt ---
./package.json
Once that script entry is made, you should be able to launch the app + API together by running yarn swa from the project root directory.
Once the app is built and the API is running, your app should be available at http://localhost:4280. Open the Chrome developer tools with Cmd+Opt+I (Mac) or Ctrl+Shift+I (Win) and, if all went well, you should see the message returned from the API.
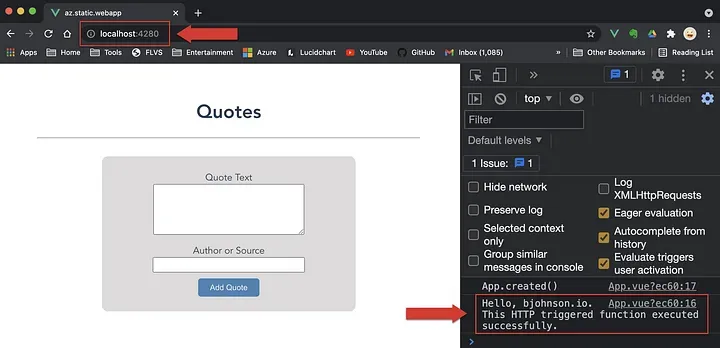
I see the message! This tells me that the serverless API endpoint /api/graphql is wired up properly and working.
Since everything looks good, go ahead and delete the created() function from the VueJS app, as we no longer need it. It's probably a good idea to commit all code changes before you move on.
Step 4: Convert the Static Web App to GraphQL
Now we get to the real work of adding GraphQL! I’ve included several screenshots and code snippets so this section looks a lot longer than it actually is. Once you’re finished, I think you’ll see that it really wasn’t much work. We’ll convert the API first, then the VueJS app. Let’s dive in.
To convert the API to GraphQL, we will install Apollo Server for Azure Functions, make a few changes to config files, and add/update a few files. Then we will test it with the func CLI (called from our package.json start script). After a successful test, we'll move on to updating the VueJS front-end.
Install dependencies & update config files
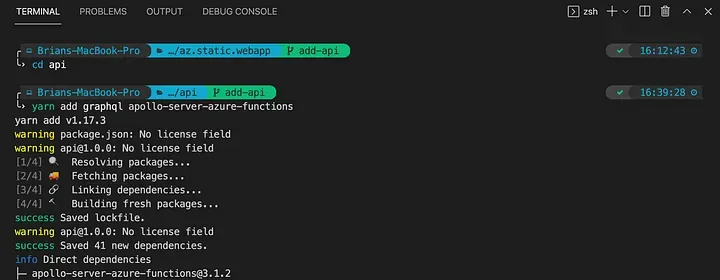
Ensure you are in your ./api directory and run the following command: yarn add graphql apollo-server-azure-functions to install the required dependencies for the API.
Next, in the ./api/graphql/function.json file, remove the get method from the bindings.in.methods array and change the bindings.out.name to $return. It should match the file below.
{
  "bindings": [
    {
      "authLevel": "anonymous",
      "type": "httpTrigger",
      "direction": "in",
      "name": "req",
      "methods": [
        "post"
      ]
    },
    {
      "type": "http",
      "direction": "out",
      "name": "$return"
    }
  ],
  "scriptFile": "../dist/graphql/index.js"
}
./api/graphql/function.json
Lastly, in your GitHub workflow file, .github/workflows/<filename>.yml, update the api_location key to api. It will default to api in most scenarios, but I have run into problems with this so it's better to be explicit.
Create a schema.ts file
Create a new file named ./api/graphql/schema.ts and add the code below. In this file, I have defined a simple graphql schema for our "quotes" app.
import { gql } from 'apollo-server-azure-functions';
export default /* GraphQL */ gql`
# GraphQL Schema
type Quote {
  id: ID
  source: String
  text: String
}
input CreateQuoteInput {
  source: String!
  text: String!
}
type Query {
  listQuotes: [Quote]!
}
type Mutation {
  createQuote(input: CreateQuoteInput!): Quote
  deleteQuote(id: ID!): Quote
}
# End Schema
./api/graphql/schema.ts
Create a handlers.ts file for our data logic
Next, create another file named ./api/graphql/handlers.ts. This is where we will keep the business logic that our resolvers call. In a larger, non-trivial app, you would probably split this up. However, since this is such a trivial app, we can keep it all in one file.
interface Quote {
  id: string
  source: string
  text: string
}

interface CreateQuoteInput {
  source: string
  text: string
}
// TERRIBLE IDEA to persist our data inside the serverless
// function, but we need something to hold us off until the
// next tutorial, where we add a serverless database.
let quotes: Quote[] = [
  {
    id: '1629335698593',
    source: 'Brian Johnson',
    text: 'Wherever you go, there you are.'
  },
  {
    id: '1629335712412',
    source: 'Nancy Johnson',
    text: 'Get off that damn computer!'
  }
];

export function listQuotes(): Quote[] {
  return quotes;
}

export function createQuote(_parent: any, args: { input: CreateQuoteInput }): Quote {
  const newQuote: Quote = {
    id: Date.now().toString(),
    source: args.input.source,
    text: args.input.text
  }
  quotes.push(newQuote);
  return newQuote;
}

export function deleteQuote(_parent: any, args: { id: string }): Quote {
  const quote = quotes.find(q => q.id === args.id);
  if (quote) {
    quotes = quotes.filter(q => q.id !== args.id);
    return quote;
  }
}
./api/graphql/handler.ts
Create a resolvers.ts file
The next file that you should create is ./api/graphql/resolvers.ts. This is a very small file that defines all of our resolvers and provides references to the logic that should be executed when each is called.
import { listQuotes, createQuote, deleteQuote } from './handlers';

export default {
  Query: {
    listQuotes
  },
  Mutation: {
    createQuote,
    deleteQuote
  }
};
./api/graphql/resolvers.ts
Update the index.ts file
Finally, we update the index.ts file. Since we’ve extracted a lot of the logic, the remaining code is quite small and simple.
import { ApolloServer } from 'apollo-server-azure-functions';
import typeDefs from './schema';
import resolvers from './resolvers';

const server = new ApolloServer({ typeDefs, resolvers });
export default server.createHandler();
./api/graphql/index.ts
In a nutshell, index.ts, our entry point script for the /api/graphql endpoint, imports ApolloServer from the Azure Functions-specific Apollo library. When we create the server on the second-from-last line, we pass in the schema (typeDefs) and resolvers (resolvers). We then return the output of server.createHandler().
Test the GraphQL API
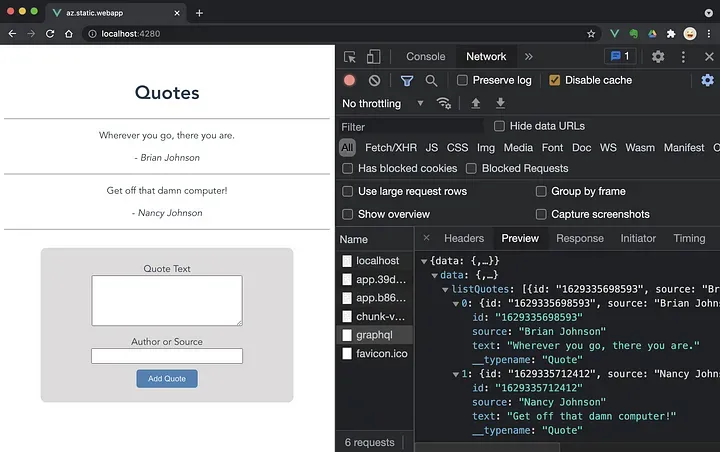
Change to the ./api directory if you're not already there and start the API development server using the yarn start command.
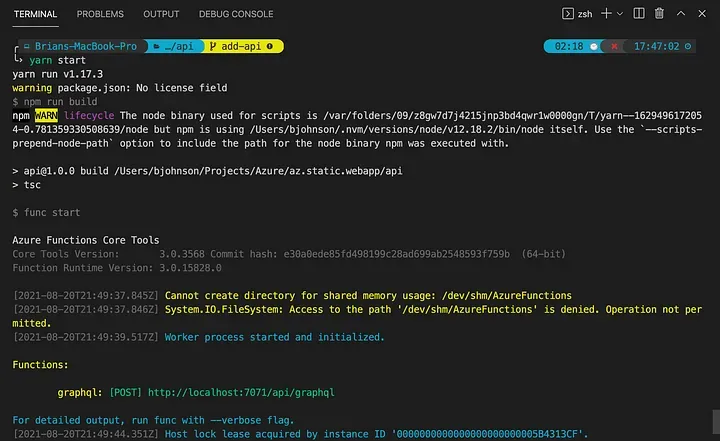
Once the function is in the ready state, as pictured above, use Insomnia to query the GraphQL endpoint.
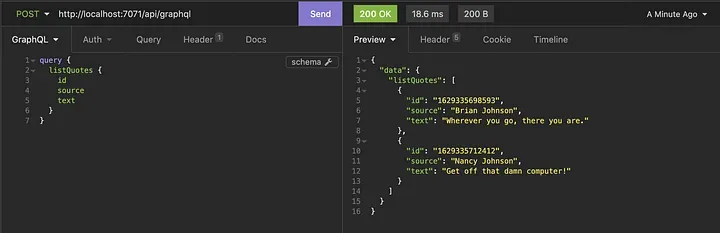
With the API endpoint tested, it looks like we’re ready to move on to the VueJS front-end.
Convert the VueJS front-end app to GraphQL
The difficult part is over; we just need to update our VueJS app to use GraphQL. Easy-peasy. Follow the steps below to update your front-end to take advantage of our new API.
Install dependencies for Apollo
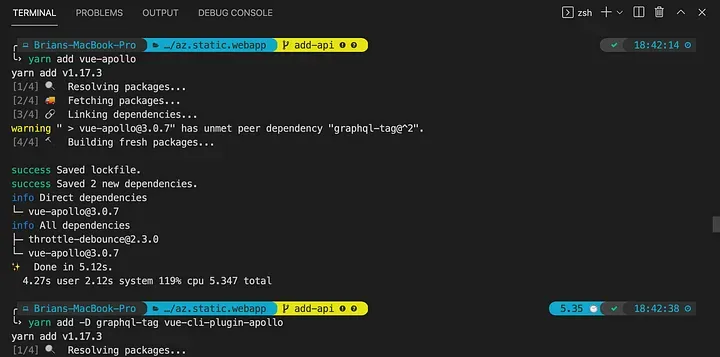
Switch to the project root directory and install the Apollo client and GraphQL dependencies with yarn add vue-apollo and yarn add -D graphql-tag vue-cli-plugin-apollo.
If you’re familiar with VueJS, you may be inclined to install Apollo with the Vue CLI, but it will generate JS boilerplate files instead of TS . It’s probably easier to just paste the TypeScript boilerplate that I provide below.
Add project files to VueJS app
Add or update the following files in your VueJS project. Pay attention to the instructions! You can simply copy/paste the new files, but for the .vue file updates, you will be instructed to replace a specific portion of code.
- Create/update the
./apollo.config.tsfile.
import * as path from 'path';
import { loadEnv } from 'vue-cli-plugin-apollo/utils/load-env';

const env = loadEnv([
  path.resolve(__dirname, '.env'),
  path.resolve(__dirname, '.env.local')
]);
export const ApolloConfig = {
  client: {
    service: env.VUE_APP_APOLLO_ENGINE_SERVICE,
    includes: ['src/**/*.{js,jsx,ts,tsx,vue,gql}']
  },
  service: {
    name: env.VUE_APP_APOLLO_ENGINE_SERVICE,
    localSchemaFile: path.resolve(__dirname, './node_modules/.temp/graphql/schema.json')
  },
  engine: {
    endpoint: process.env.APOLLO_ENGINE_API_ENDPOINT,
    apiKey: env.VUE_APP_APOLLO_ENGINE_KEY
  }
}
export default ApolloConfig;
./apollo.config.ts
2. Create the ./src/vue-apollo.tsfile with the content shown below.
import Vue from 'vue';
import VueApollo from 'vue-apollo';
import { createApolloClient } from 'vue-cli-plugin-apollo/graphql-client';

Vue.use(VueApollo)
const AUTH_TOKEN = 'apollo-token'
const defaultOptions = {
  httpEndpoint: '/api/graphql',
  wsEndpoint: null,
  tokenName: AUTH_TOKEN,
  persisting: false,
  ssr: false,
}

// Call this in the Vue app file
export function createProvider (options = {}) {
  // Create apollo client
  const { apolloClient } = createApolloClient({
    ...defaultOptions,
    ...options,
  })
  const apolloProvider = new VueApollo({
    defaultClient: apolloClient,
    errorHandler (error) {
      // eslint-disable-next-line no-console
      console.log('%cError', 'background: red; color: white; padding: 2px 4px; border-radius: 3px; font-weight: bold;', error.message)
    },
  })

  return apolloProvider
}

export async function onLogin (apolloClient, token) {
  if (typeof localStorage !== 'undefined' && token) {
    localStorage.setItem(AUTH_TOKEN, token)
  }

export async function onLogout (apolloClient) {
  if (typeof localStorage !== 'undefined') {
    localStorage.removeItem(AUTH_TOKEN)
  }
}
./src/vue-apollo.ts
3. Update the ./src/main.tsfile with the contents below.
import Vue from 'vue';
import VModal from 'vue-js-modal';
import App from './App.vue';
import { createProvider } from './vue-apollo';

Vue.config.productionTip = false;
Vue.use(VModal, { dialog: true });

new Vue({
  apolloProvider: createProvider(),
  render: h => h(App)
}).$mount('#app');
4. Update the ./src/types/quotes.tsfile using the contents below.
export class Quote {
    constructor(
        public source: string,
        public text: string,
        public id = '',
    ) {}
}
./src/types/quote.ts
5. Create the ./src/graphql/quotes.tsfile using the contents below.
import gql from 'graphql-tag';

const CREATE_QUOTE = gql`
  mutation createQuote($input: CreateQuoteInput!) {
    createQuote(input: $input) {
      id
      source
      text
    }
  }
`;

const DELETE_QUOTE = gql`
  mutation deleteQuote($id: ID!) {
    deleteQuote(id: $id) {
      id
      source
      text
    }
  }
`;

const LIST_QUOTES = gql`
  query {
    listQuotes {
      id
      source
      text
    }
  }
`;

export const GQL = {
  QUERY: {
    LIST_QUOTES,
  },
  MUTATION: {
    CREATE_QUOTE,
    DELETE_QUOTE,
  },
}
export default GQL;
./src/graphql/quotes.ts
6. Update the <script> and <template> sections of ./src/components/CreateQuote.vue with the boilerplate below. Leave the <style> tag as-is.
<template>
  <div class="add-form">
    <div class="form-input">
      <div>
        <label for="quote-input">Quote Text</label>
      </div>
      <div>
        <textarea id="quote-input" v-model="text" />
      </div>
    </div>
    <div class="form-input">
      <div>
        <label for="source-input">Author or Source</label>
      </div>
      <div>
        <input id="source-input" v-model="source" />
      </div>
    </div>
    <div class="form-input">
      <button @click="submitForm" :disabled="!source || !text">Add Quote</button>
    </div>
  </div>
</template>

<script lang="ts">
import Vue from 'vue';
import { GQL } from '@/graphql/quotes';
export default Vue.extend({
  name: 'CreateQuote',
  data: () => ({
    source: '',
    text: ''
  }),
  methods: {
    async submitForm() {
      console.log('submitForm()');
      const res = await this.$apollo.mutate({
        mutation: GQL.MUTATION.CREATE_QUOTE,
        variables: {
          input: {
            source: this.source,
            text: this.text,
          }
        },
        refetchQueries: [
          { query: GQL.QUERY.LIST_QUOTES },
        ]
      });
      console.log(res);
      this.source = '';
      this.text = '';
    }
  }
});
</script>
./src/components/CreateQuote.vue
7. Update the <script> and <template> sections of ./src/components/Quotes.vue with the boilerplate below. Leave the <style> tag as-is.
<template>
  <div class="hello">
    <v-dialog />
    <h1>Quotes</h1>
    <hr />
    <div v-for="q of listQuotes" :key="q.id" @click="confirmDelete(q)">
      <p>{{ q.text }}</p>
      <p>
        - <em>{{ q.source }}</em>
      </p>
      <hr />
    </div>
    <CreateQuote/>
  </div>
</template>

<script lang="ts">
import GQL from '@/graphql/quotes';
import { Quote } from '@/types/quote';
import Vue from 'vue';
import CreateQuote from './CreateQuote.vue';
export default Vue.extend({
  name: 'Quotes',
  components: {
    CreateQuote
  },
  apollo: {
    listQuotes: {
      query: GQL.QUERY.LIST_QUOTES
    }
  },
  methods: {
    confirmDelete(quote: Quote) {
      this.$modal.show('dialog', {
        title: 'Delete this quote?',
        text: 'Please confirm or cancel deletion of this quote.',
        buttons: [
          {
            title: 'Cancel',
            handler: () => this.$modal.hide('dialog')
          },
          {
            title: 'Delete',
            handler: async () => {
              this.$modal.hide('dialog');
              await this.deleteQuote(quote);
            }
          }
        ]
      });
    },
    async deleteQuote({ id }: Quote) {
      console.log(`deleteQuote(${id})`);
      await this.$apollo.mutate({
        mutation: GQL.MUTATION.DELETE_QUOTE,
        variables: { id },
        refetchQueries: [
          { query: GQL.QUERY.LIST_QUOTES },
        ]
      });
    }
  },
});
</script>
./src/components/Quotes.vue
Test the VueJS Apollo client
After adding and updating the files, spin up the development server with yarn swa from the project root directory. You should have a working, serverless GraphQL API now!
Step 5: Deploy the app to production
Congratulations! If you made it this far in the tutorial, you already have a working VueJS + GraphQL app and it has been successfully tested locally with the swa CLI. Now we will push our code and open a pull request—which will automatically deploy the code to a staging environment. After checking the staging environment, we'll merge the pull request, which will kick off the CI/CD action to deploy to production. Once it is deployed to production, the app can be accessed from your custom domain.
Push code to GitHub repo
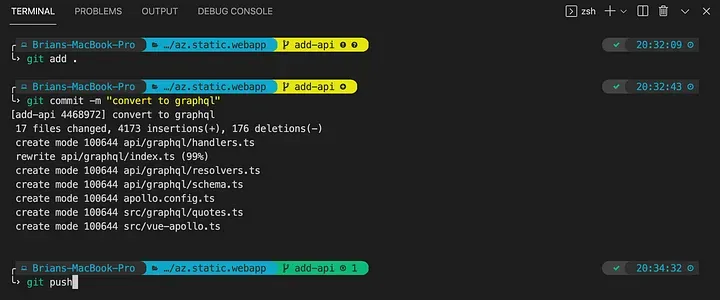
In the root project folder, issues git add . and git commit -m "convert to graphql" to commit the code. The push to your repo with git push.
Open pull request against master
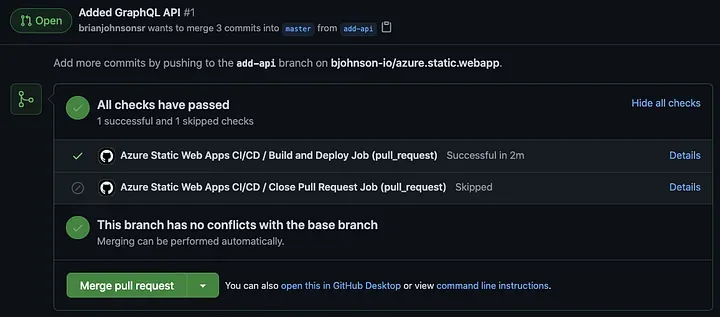
Navigate to your GitHub repo in the browser and open a pull request (master <– add-api) and wait for the checks to pass.
Launch the staging environment from the Azure Portal
Next, navigate to your Azure Static Web App in the Azure Portal and select [Environment] from the sidebar menu. You should see the staging environment that was created by the pull request. Click the [Browse] link to open the app.
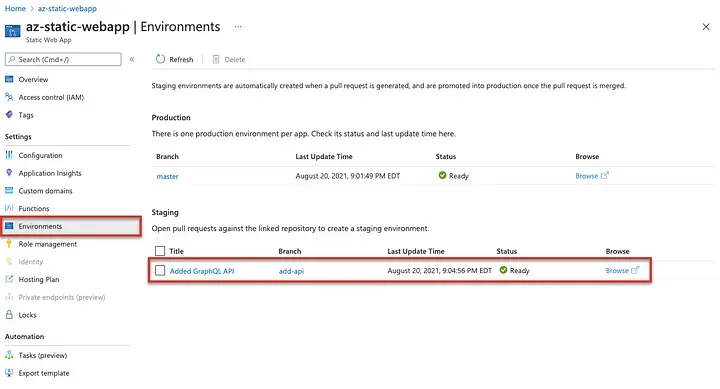
Take a moment to manually exercise the application to ensure there are no problems. Once you are ready to push the app to production, continue to the next task.
Merge pull request to kickoff CI/CD production deployment
Merging the pull request will automatically shutdown the staging environment and deploy the app to production. Check the [Actions] tab of your repo to check the deployment process.
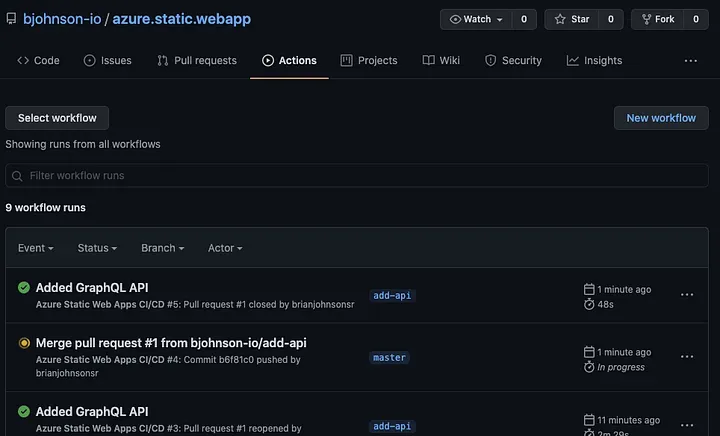
Once the process completes, continue to the next task.
Verify production deployment at your custom domain
At this point, you should be able to open the app using your custom domain. Navigate in your browser to your custom domain and verify that all is well.
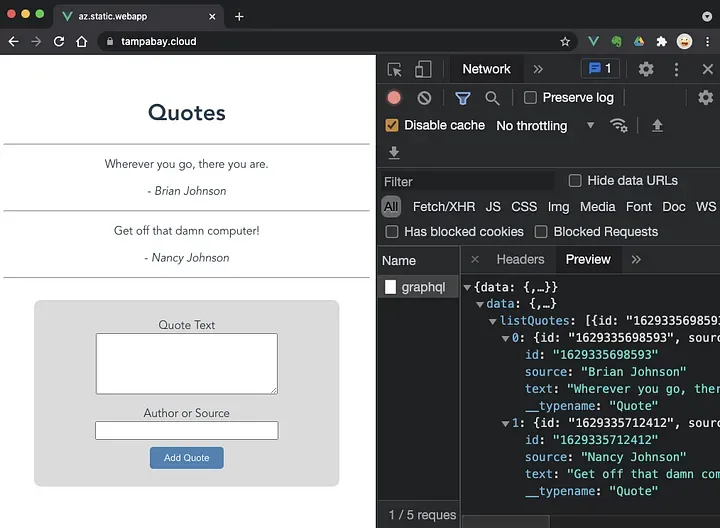
Hooray, we’re done! 🎉
Next Steps: Add a serverless database
Well, we’re done… but not quite done. This tutorial was long enough with only the API. So, if you noticed in the code above, we persisted the data to an in-memory array. This is an absolutely terrible approach when using serverless or otherwise operating in a distributed system. It served its purpose as a stop-gap measure, but it is time to move on to something more permanent.
Therefore, in the next post of this series, we will be adding a serverless database (CosmosDB) and use it in the serverless API to persist our data. If you want to use something other than CosmosDB, you can modify your API code to include your database client — just as you would do with any Node/TypeScript project.